I love using a cloud-based virtual machine as my developer machine. A moment’s thought will reveal why. A VM is isolated. You can set up a developer environment on a per-project basis. You can access it from anywhere, untethering yourself from your office chair. You can also turn it off when not using to save money.
As great as that sounds, and it is, I have never used a VM (at least in Azure) for mobile development. It’s hard to find the right configuration for an Android emulator to work. Besides, I would rather use my device to test while I’m developing.
In this article I’ll show you how to install the latest MAUI preview with .NET 6 RC1 and Visual Studio 2022 Preview. I’ll also give a resource that will allow you to develop using your local Android device, even though Visual Studio is running in the cloud.
I’m not covering iOS devices in this blog post because I could not get them working using this workflow. Might be just me.
You can watch a video of me building this solution from start to finish at https://youtu.be/Pmr5nDJ1Q7w
Step 1: Create a new Azure VM
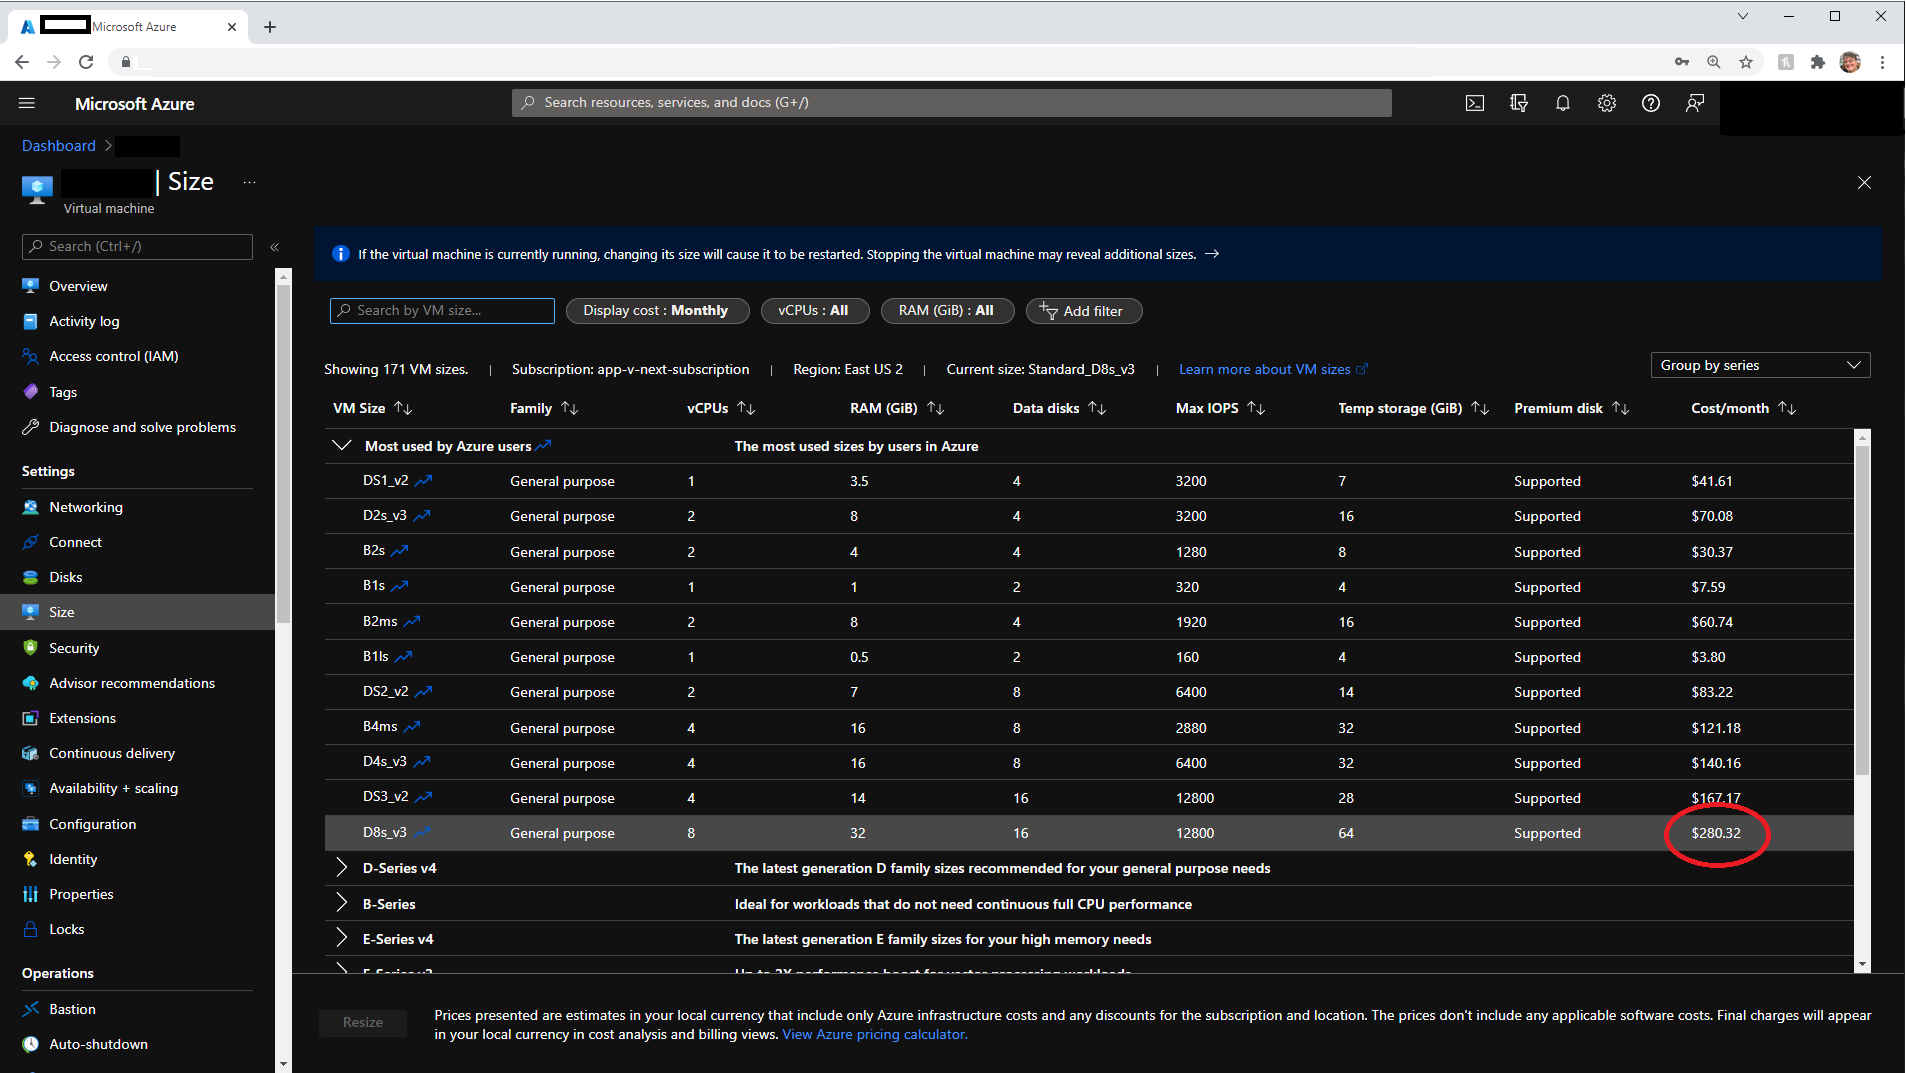
For this, I chose the “Standard D8s v3 (8 vcpus, 32 GiB memory)” SKU, which would cost about $280/month if you ran it 24/7. If you’re only using it for 8 hours a day the cost would be less than $100/month.
Step 2: Install Visual Studio 2022 Preview
You can download the Visual Studio Installer for VS2022 from https://visualstudio.microsoft.com/vs/preview/ Follow the instructions to install from https://docs.microsoft.com/en-us/dotnet/maui/get-started/installation
Let’s go over the critical install steps:
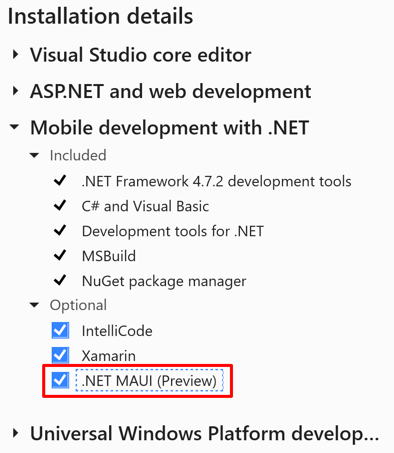
First, make sure you check off ASP.NET and web development, Universal Windows Platform development, and Mobile development with .NET.
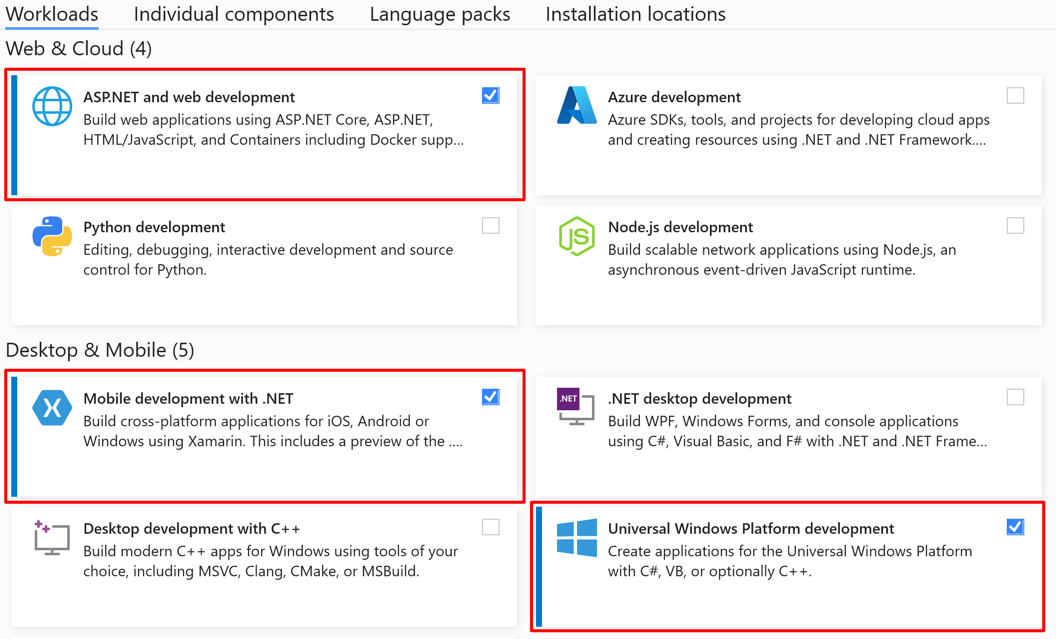
Next, in the Installation details > Mobile development with .NET section of the installation window, check the .NET MAUI (Preview) optional workload, as it is NOT selected by default.
Step 3: Install requirements for Android devices.
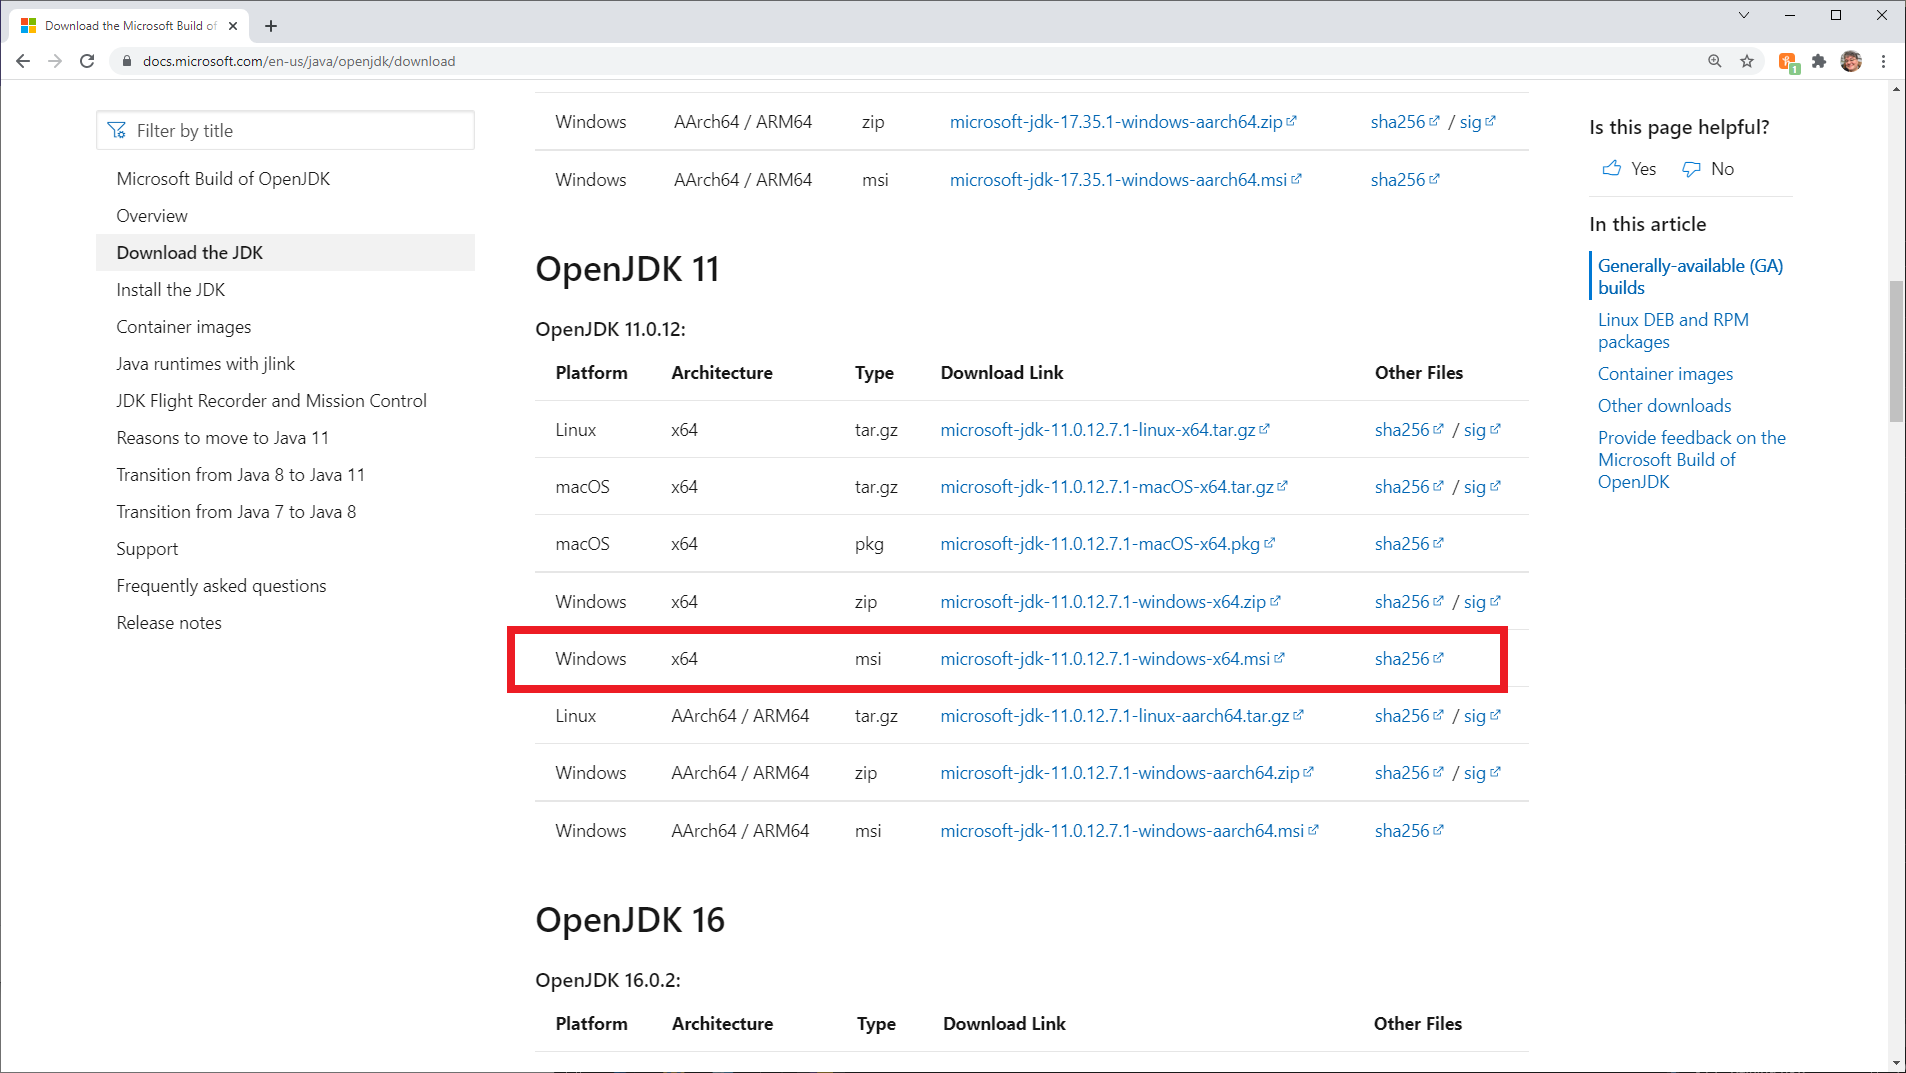
First, install Microsoft OpenJDK version 11 from https://docs.microsoft.com/en-us/java/openjdk/download.
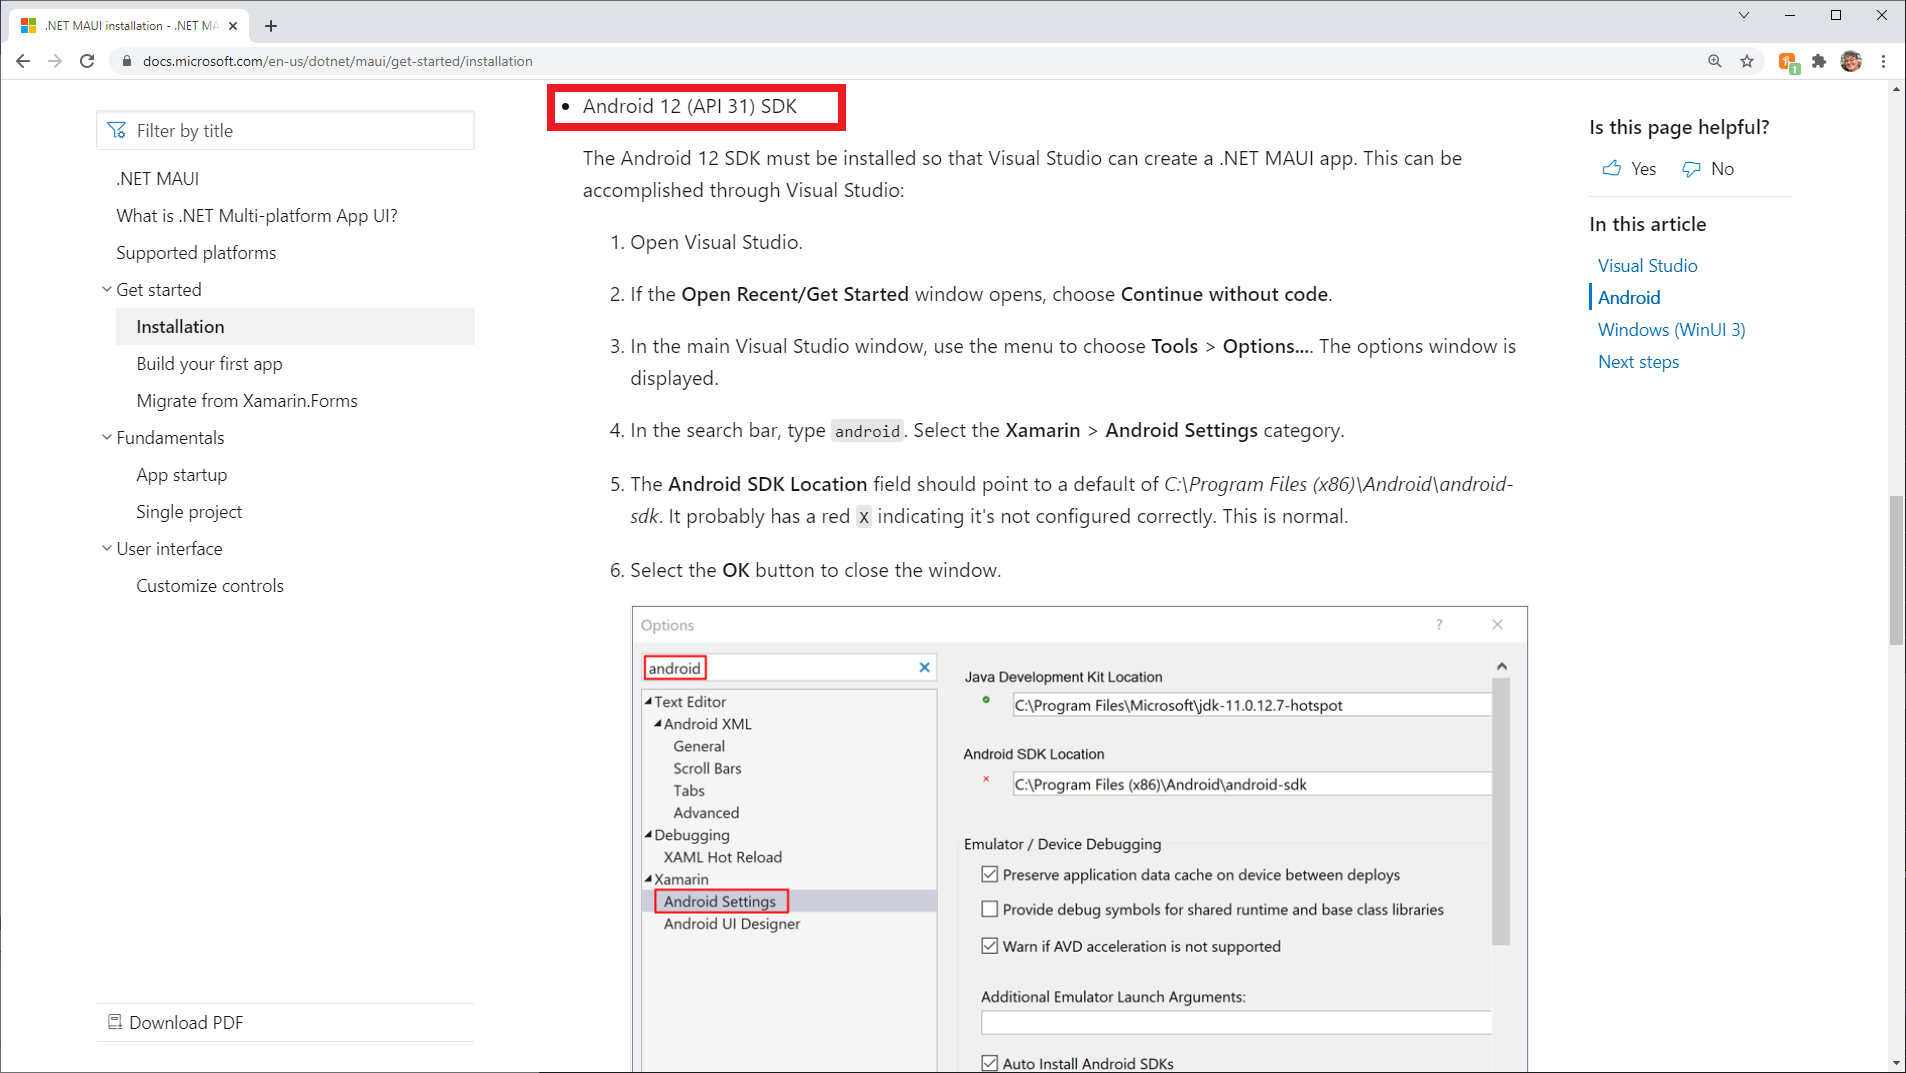
Next, follow the instructions at https://docs.microsoft.com/en-us/dotnet/maui/get-started/installation to install the Android 12 (API 31) SDK.
Step 4: Install Usb for Remote Desktop
This is the secret sauce. Download and install USB for Remote Desktop from https://www.usb-over-network.com/usb-for-remote-desktop.html.
You must install two apps: Server, which you install in your VM, and Workstation, which you install on your local machine.
They have a free trial, but the cost for a single developer is only 12 bucks a month. If you plan to use a VM for regular mobile work, this is money well spent.
Once installed, connect to your VM with RDP, but make sure you add your Android device to the list of local resources.
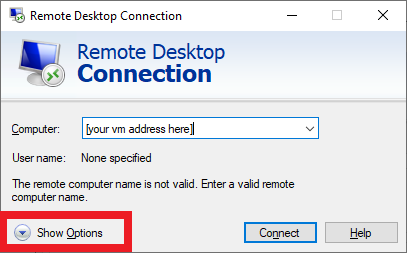
To accomplish this, run Remote Desktop Connection, and click the Show Options dropdown
Select the Local Resources tab, then click the More button.
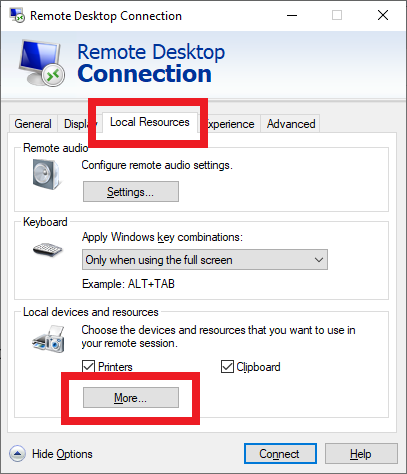
Expand Other supported Plug and Play (PnP) devices and select your device from the list.

Step 5: Install your Android device’s USB driver
Download and install your Android device’s USB Driver in the VM
If you use a Samsung phone, you can install the USB driver from https://developer.samsung.com/mobile/android-usb-driver.html
Be careful. There are lots of unofficial sites offering plenty of clickbait. Make sure you get yours from the source website.
STEP 6: Connect to VM and register your Android Device
Once connected to your VM, expand the Show hidden icons button in the toolbar, and then right-click on the FabulaTech USB for Remote Desktop icon
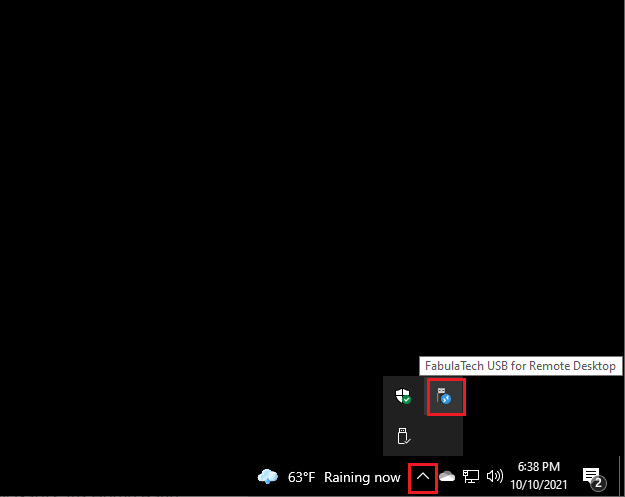
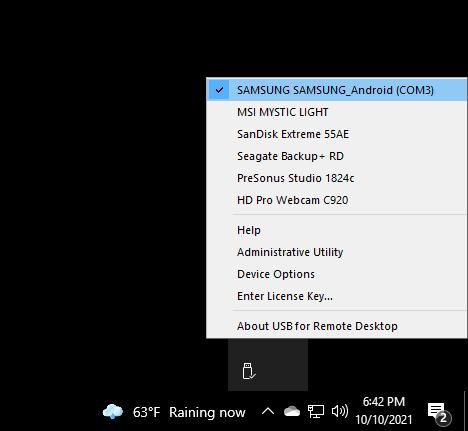
Select your device from the list presented to you.
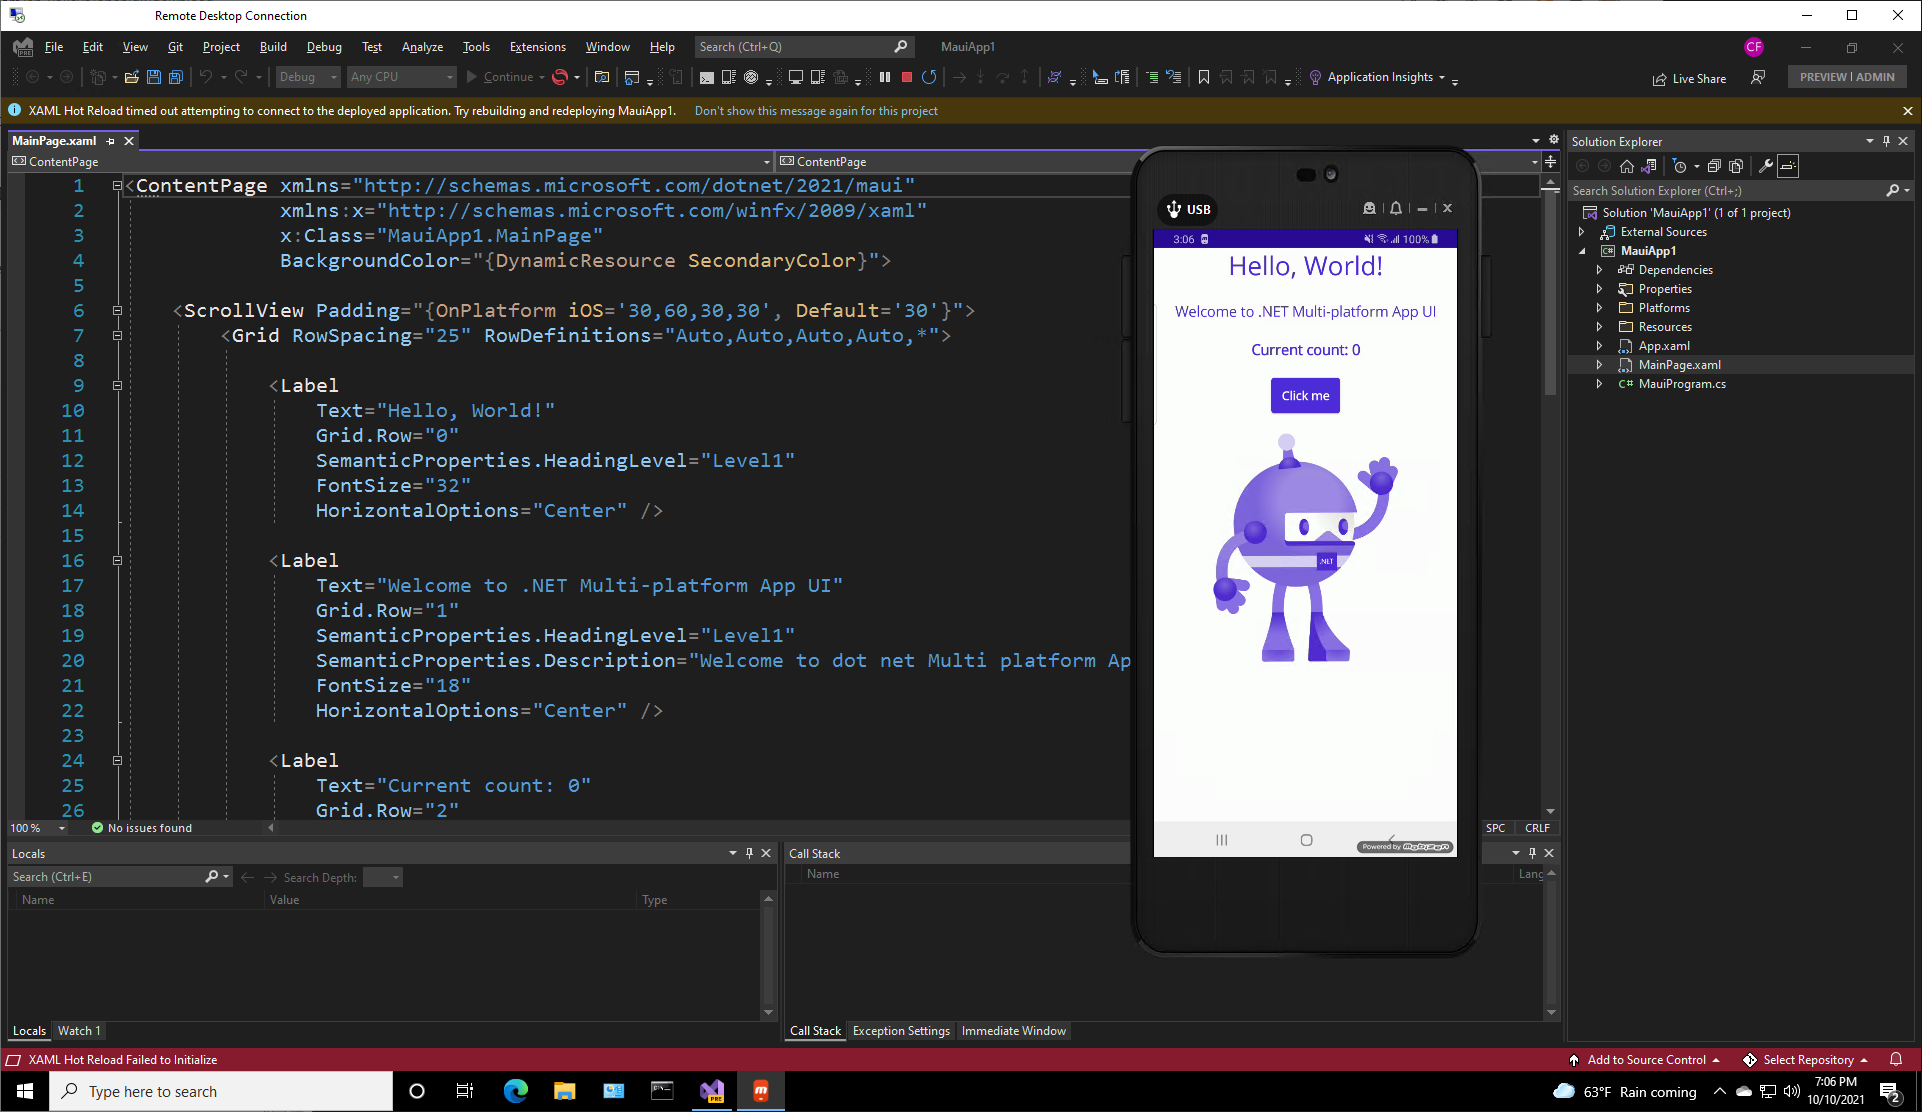
Step 7: Build and test your first MAUI app
Follow steps 1 through 4 from https://docs.microsoft.com/en-us/dotnet/maui/get-started/first-app?pivots=windows to build your first MAUI app. It is important to wait patiently until all of the dependencies have been recognized.
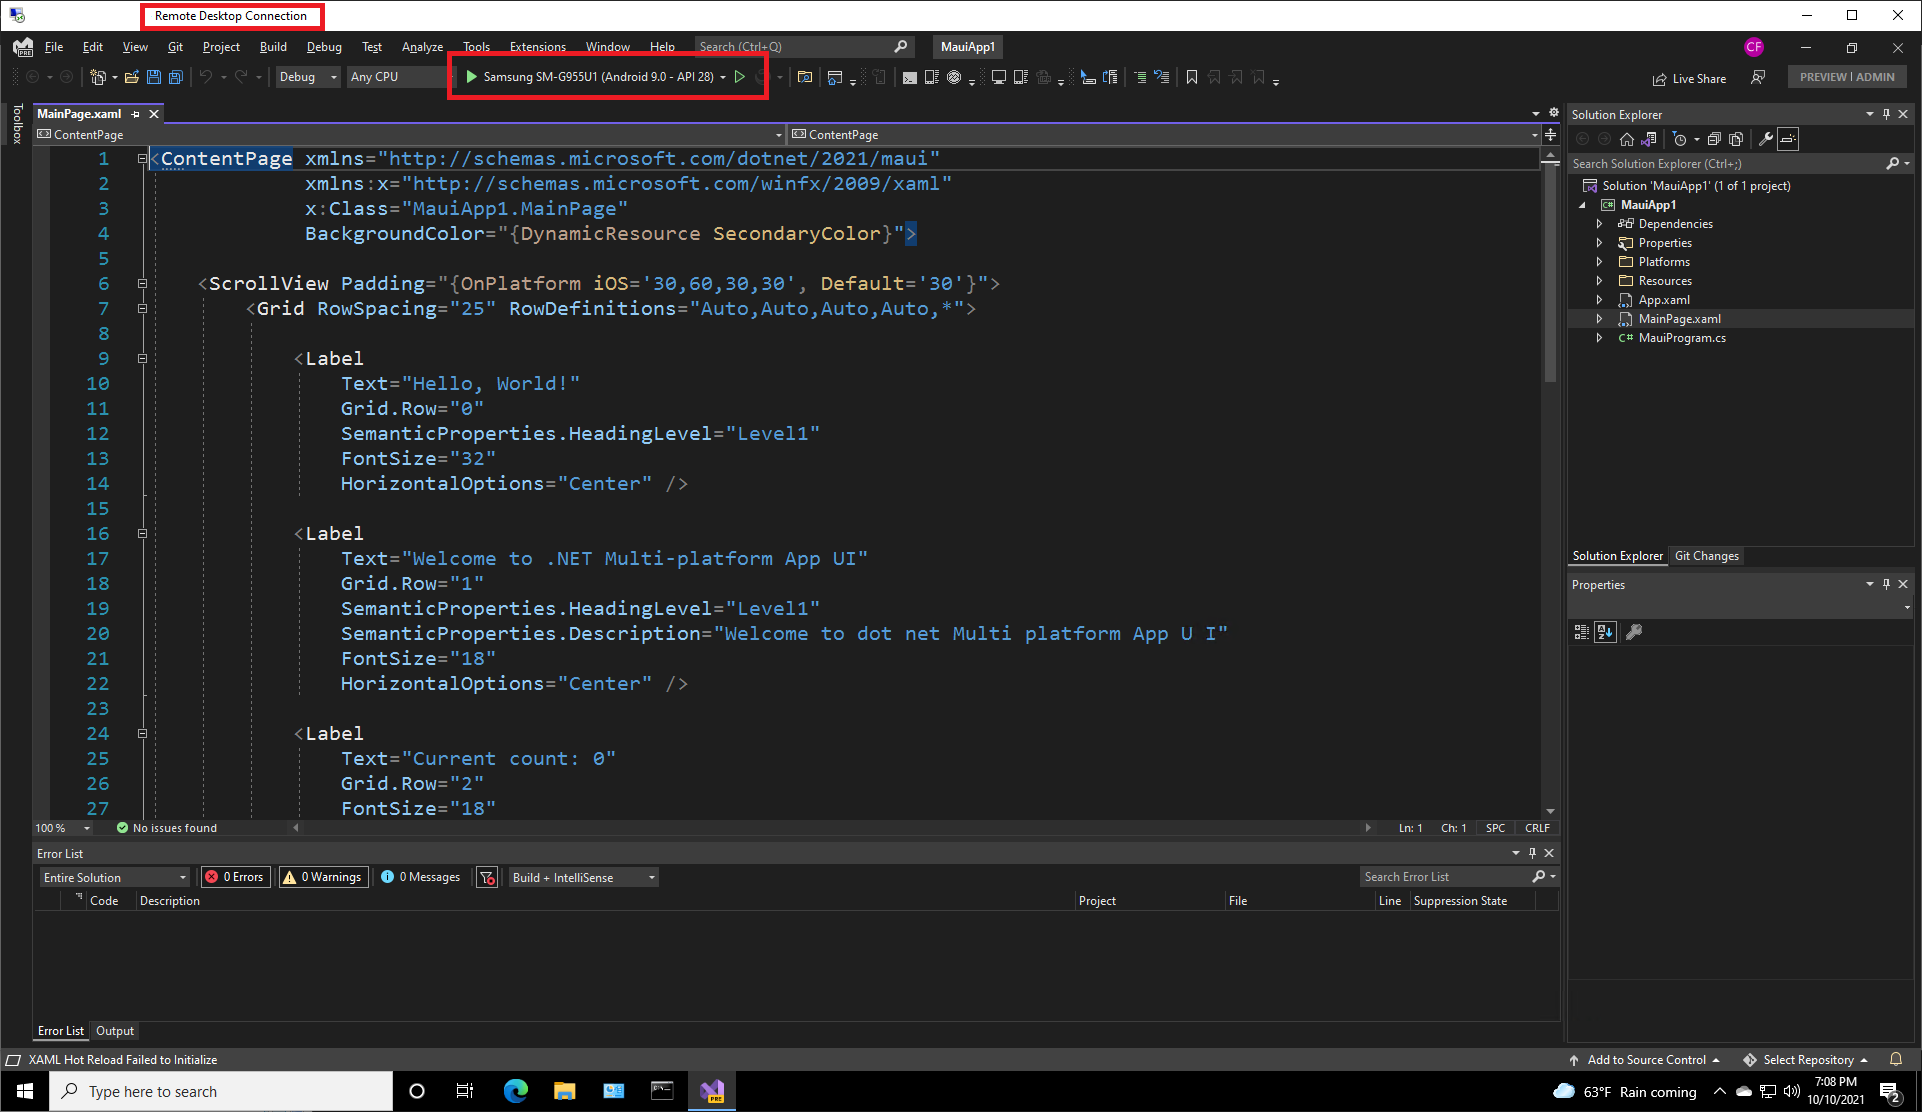
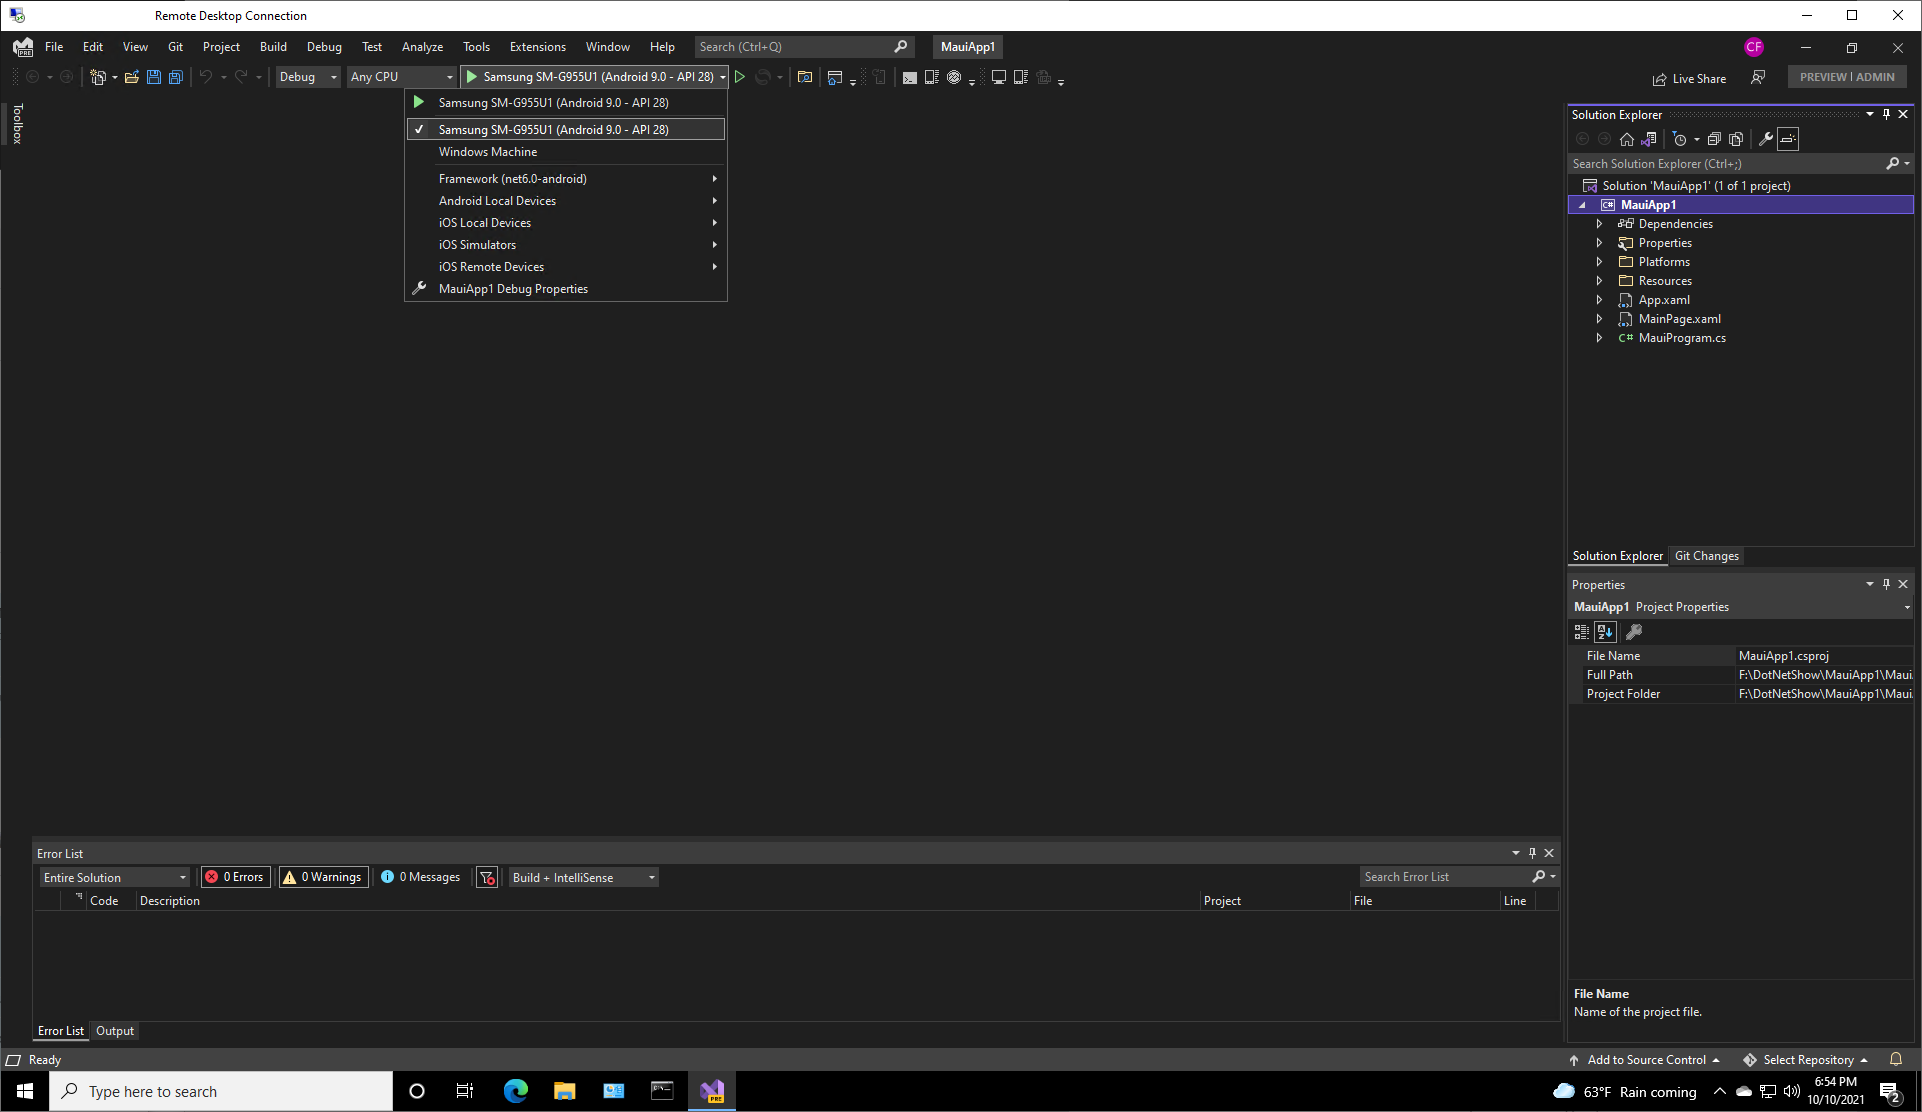
Step 8: Select the Android Platform and your local device.
If you wait long enough, Visual Studio should see your device and set it as the default target of deployment. If it doesn’t see your device, make sure it is selected by USB Remote Desktop as per Step 6.
This dropdown is how you select not only the device but the platform that you’re going to deploy to and run.
Step 9: Run the app
You must be patient! Go get a cup of coffee. It may take a while. Don’t stop it before it has a chance to complete. Wait until it gets past the .NET logo splash screen.
Yes, Hot Reload will probably not work due to the latency, but you get to see your app on your phone even though you’re developing in the cloud.